

Before we deploy new DAG to production, it’s best practice to test it out locally to spot any coding error. We can setup Airflow locally relatively simple using Docker. I reference the tutorial on Youtube by Tuan Vu and using more recent version of Airflow to set it up locally. It involves the following 6 steps to set it up and we will go through it one by one:
- Install Docker Desktop
- Fetch docker-compose.yaml from Airflow
- Configure your DAG file
- Setup Google Cloud connection in Airflow UI
- Test run single task from the DAG in Airflow CLI
- Full run the DAG in Airflow UI
Install Docker Desktop
For Airflow to running locally in Docker, we need to install Docker Desktop, it comes with Docker Community Edition and Docker Compose which are two prerequisites to run Airflow with Docker.
It can be downloaded and installed here in Docker official site.
Fetch docker-compose.yaml from Airflow
After installing docker, let’s create a working folder in your preferred location. I’ll call it airflow-docker.
Use your terminal, fetch the docker-compose.yaml with the following command.
curl -LfO 'https://airflow.apache.org/docs/apache-airflow/2.3.4/docker-compose.yaml'
This is the Docker file that will help to create the Airflow environment when you run the docker command. There are several directories and user sertting required by the Docker so let’s configure them.
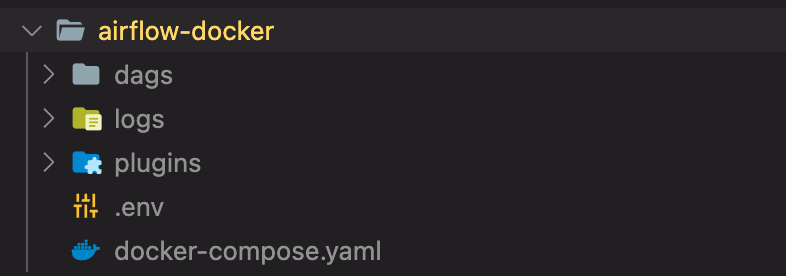
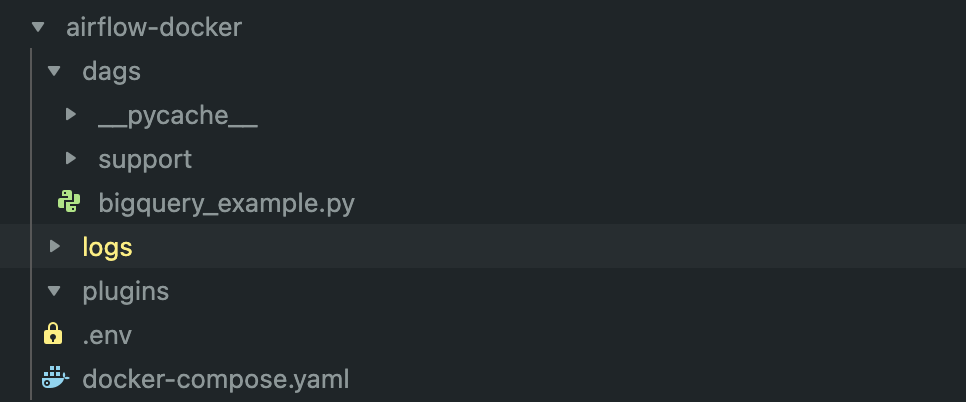
mkdir -p ./dags ./logs ./plugins
echo -e "AIRFLOW_UID=$(id -u)\nAIRFLOW_GID=0" > .env
Your file structure should look like this now.
Configure your DAG file
Assuming you have a DAG for running some BigQuery tasks, we need to place the DAG file into the dags directory. Here I am using a simple DAG with just several BigQueryOperator to run some queries for demonstation purpose. For how to construct a DAG, it will be covered in another post. The following is the DAG we are going to use:
import json
from datetime import timedelta, datetime

from airflow import DAG
from airflow.contrib.operators.bigquery_operator import BigQueryOperator
from airflow.contrib.operators.bigquery_check_operator import BigQueryCheckOperator

default_args = {
    'owner': 'airflow',
    'depends_on_past': True,
    'start_date': datetime(2022, 8, 25),
    'end_date': datetime(2022, 8, 31),
    'email': ['airflow@airflow.com'],
    'email_on_failure': True,
    'email_on_retry': False,
    'retries': 2,
    'retry_delay': timedelta(minutes=5),
}

# Set Schedule: Run pipeline once a day.
# Use cron to define exact time. Eg. 8:15am would be "15 08 * * *"
schedule_interval = "00 08 * * *"

# Define DAG: Set ID and assign default args and schedule interval
dag = DAG(
    'bigquery_properties',
    default_args=default_args,
    schedule_interval=schedule_interval
    )

# Config variables
BQ_CONN_ID = "my_gcp_conn"
BQ_PROJECT = "gary-yiu-001"
BQ_DATASET = "testing_dataset"

## Task 1: check that the data table is existed in the dataset

t1 = BigQueryCheckOperator(
        task_id='bq_check_properties_raw',
        sql='''
        SELECT
            COUNT(DISTINCT url) AS ct
        FROM
        `gary-yiu-001.testing_dataset.properties_raw`
        ''',
        use_legacy_sql=False,
        bigquery_conn_id=BQ_CONN_ID,
        dag=dag
    )

## Task 2: Run a query and store the result to another table
t2 = BigQueryOperator(
        task_id='bq_write_to_properties_inter',
        sql='''
        #standardSQL
        SELECT
          *,
          ROW_NUMBER() OVER (PARTITION BY url ORDER BY full_description DESC) AS rn
        FROM `gary-yiu-001.testing_dataset.properties_raw`
        QUALIFY ROW_NUMBER() OVER (PARTITION BY url ORDER BY full_description DESC) = 1
        ''',
        destination_dataset_table='{0}.{1}.properties_inter'.format(
            BQ_PROJECT, BQ_DATASET
        ),
        write_disposition='WRITE_TRUNCATE',
        allow_large_results=True,
        use_legacy_sql=False,
        bigquery_conn_id=BQ_CONN_ID,
        dag=dag
    )

# Task 3: Check if inter data is written successfully
t3 = BigQueryCheckOperator(
    task_id='bq_check_properties_inter',
    sql='''
    #standardSQL
    SELECT
        COUNT(*) AS rows_in_partition
    FROM `{0}.{1}.properties_inter`
    '''.format(BQ_PROJECT, BQ_DATASET
        ),
    use_legacy_sql=False,
    bigquery_conn_id=BQ_CONN_ID,
    dag=dag)

# Setting up Dependencies
t2.set_upstream(t1)
t3.set_upstream(t2)
Within the DAG file, there are several things we need to configure including BQ_CONN_ID, BQ_PROJECT and BQ_DATASET. For BQ_CONN_ID, it is going to be the same id we put in Airflow UI later on. For BQ_PROJECT, it needs to be the project ID you’re using in BigQuery and BQ_DATASET would be the dataset name in BigQuery.
After configure those fields, let’s put the file into the dags directory.
Setup Google Cloud connection in Airflow UI
Before we setup the Google Cloud connection in Airflow UI, we need to generate a service account key from GCP to allow access from our local machine to the GCP. To create a key, access the service accounts panel, click Manage Keys under Actions. You can then create a new JSON key which will be download to your machine automatically.

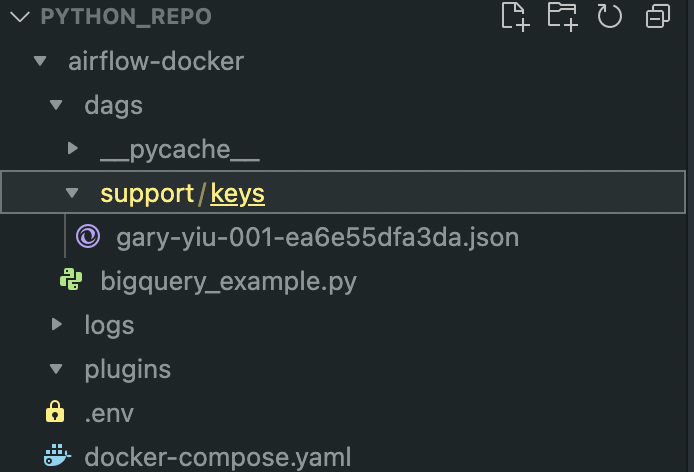
After downloading the key, create a directory inside your dags directory and paste the key json file in it.
Now we can finally turn the Airflow on and configure the GCP connection. To initialize the environment, use the following Docker command in your terminal.
docker-compose up airflow-init
After it’s done, use the following to run airflow locally.
docker-compose up
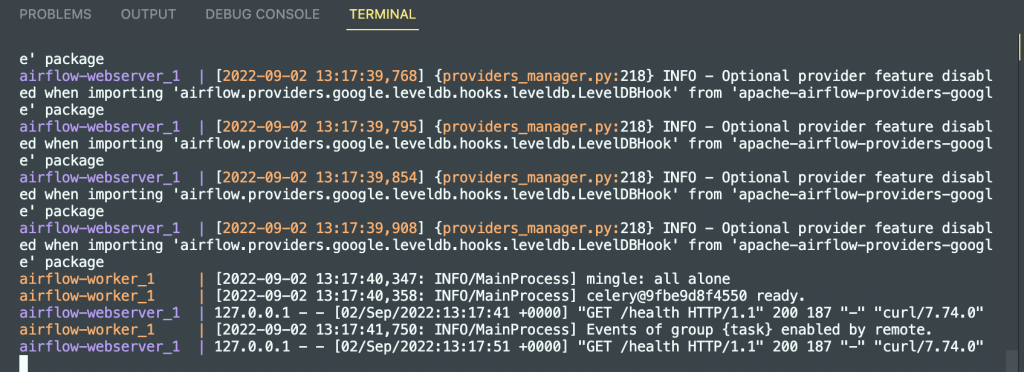
It would take some time for the environment to start, once it’s finished you will see the airflow-webserver keeps updating the health status and display the message in the terminal.
Access the Airflow UI by using your web brower entering the following address: http://localhost:8080/home
The first time you start the local Airflow server, the login panel will pull up and we can login using “airflow” as our id and password.
In Airflow, go to Admin -> Connections. By default you should see nothing listed, we can go ahead to add a new record.
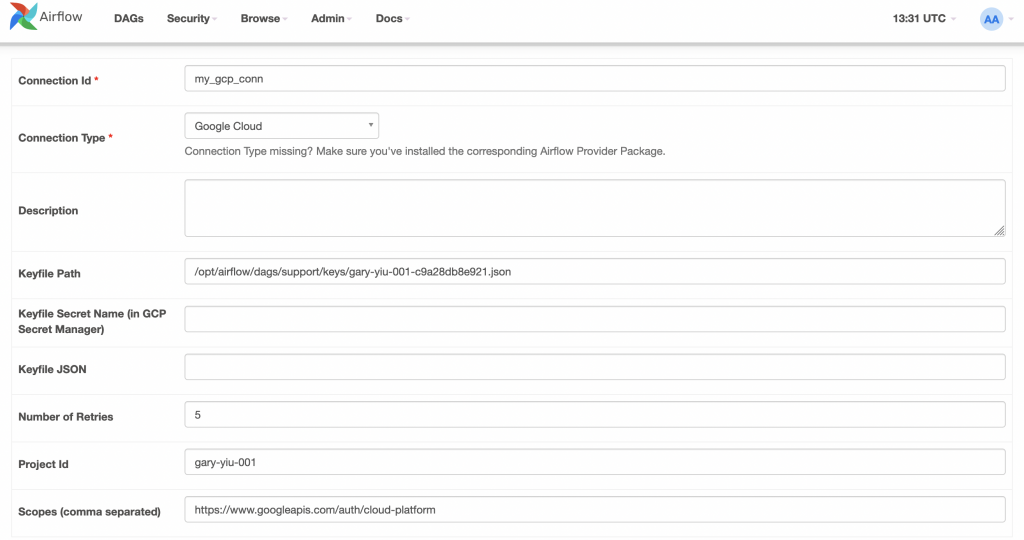
When adding a new record, there are several fields we need to input. Save your changes after putting in the configurations.
- Connection Id: This should be the same as the value you set in your DAG, in my case I put my_gcp_conn
- Connection Type: Select Google Cloud
- Keyfile Path: This should be the path to the key json file you put in dags directory, starts with /opt/airflow/dags/(…directory…)/(…key…).json
- Project Id: This should be the same as the your project ID in GCP
- Scopes: https://www.googleapis.com/auth/cloud-platform
Test run single task from the DAG in Airflow CLI
Now we have the GCP connection set up in Airflow, we can test out indiviual task in the DAG from the terminal. It is a good pratice to do that instead of running the entire DAG when testing, so we can spot errors early on with a smaller scope. Let try to run the first task in the above DAG using this Docker command. Be reminded to run the test in a seperate terminal as our original terminal is running the Airflow.
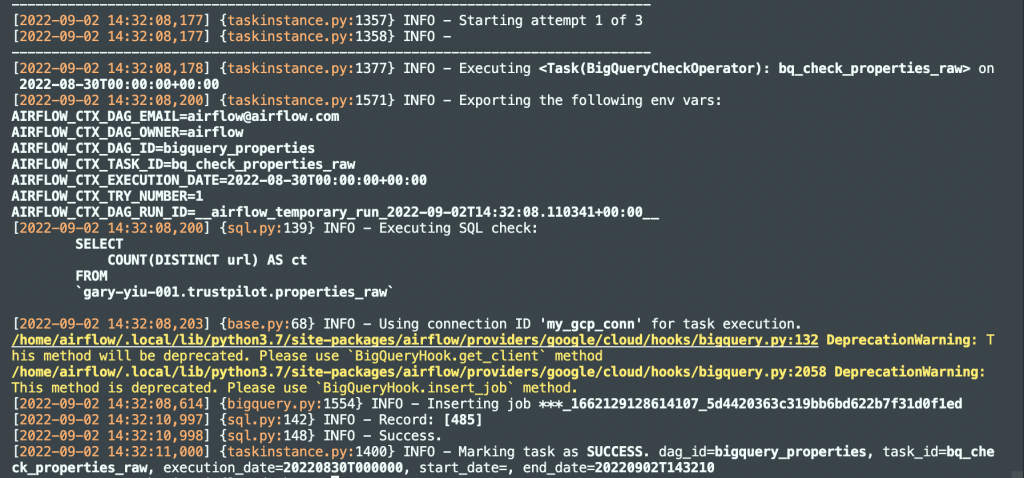
docker-compose -f docker-compose.yaml run --rm airflow-webserver airflow tasks test bigquery_properties bq_check_properties_raw 2022-08-30
The above command includes parameters in the following format if you want to run other individual task in the DAG. We need to pass in the DAG id, task_id and the execute date to run the test.
docker-compose -f docker-compose.yaml run --rm airflow-webserver airflow tasks test (DAG id) (task_id) (execute date)
After running the command, we should see the following result, showing the query we ran and the result come back from BigQuery. We can see a count of 485 was returned from the query.
Full run the DAG in Airflow UI
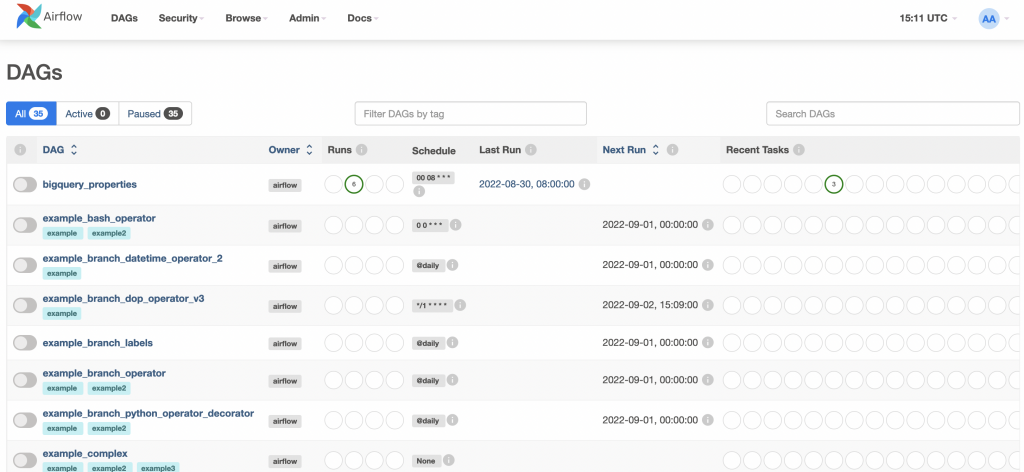
When we are ready to run the entire DAG, we can head to the Airflow UI in the web browser. Enable the DAG by toggle the switch. After toggle it to unpause the DAG, it will start to run automatically according the schedule set in the DAG default_args.
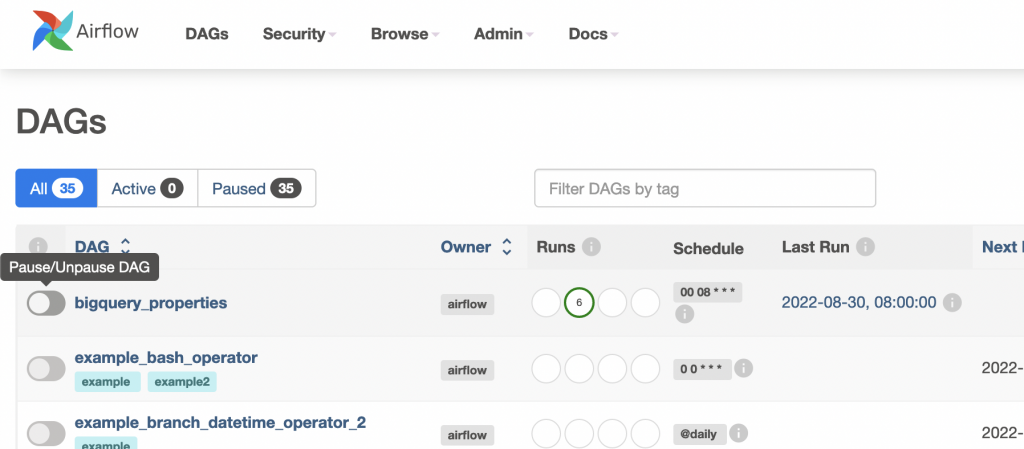
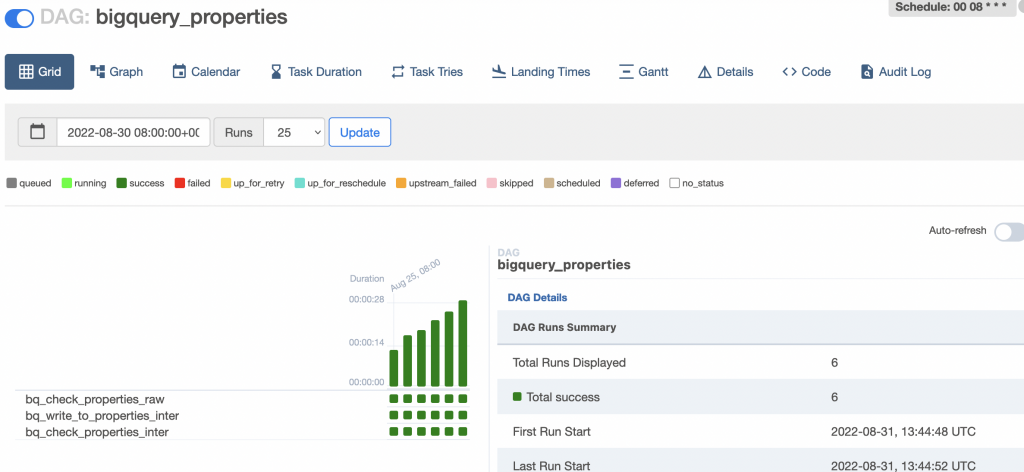
Selecting the DAG bigquery_properties you can view if the runs are success and if there’s any error in any particular execute date.
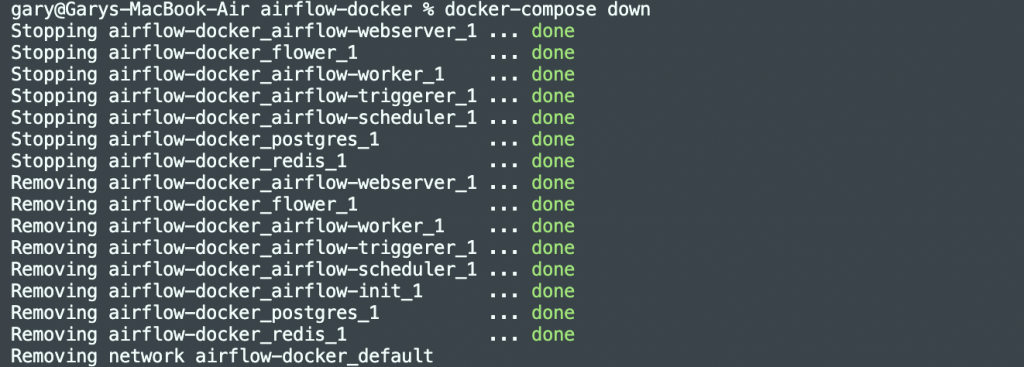
That is how we run Airflow DAG locally using Docker. We need to close our Airflow server when we’re done by pressing Ctrl + C in the terminal instance running the Docker. Alternatively, you can use the following command in a seperate terminal.
docker-compose down